10. The Windowpane Wall Organizer
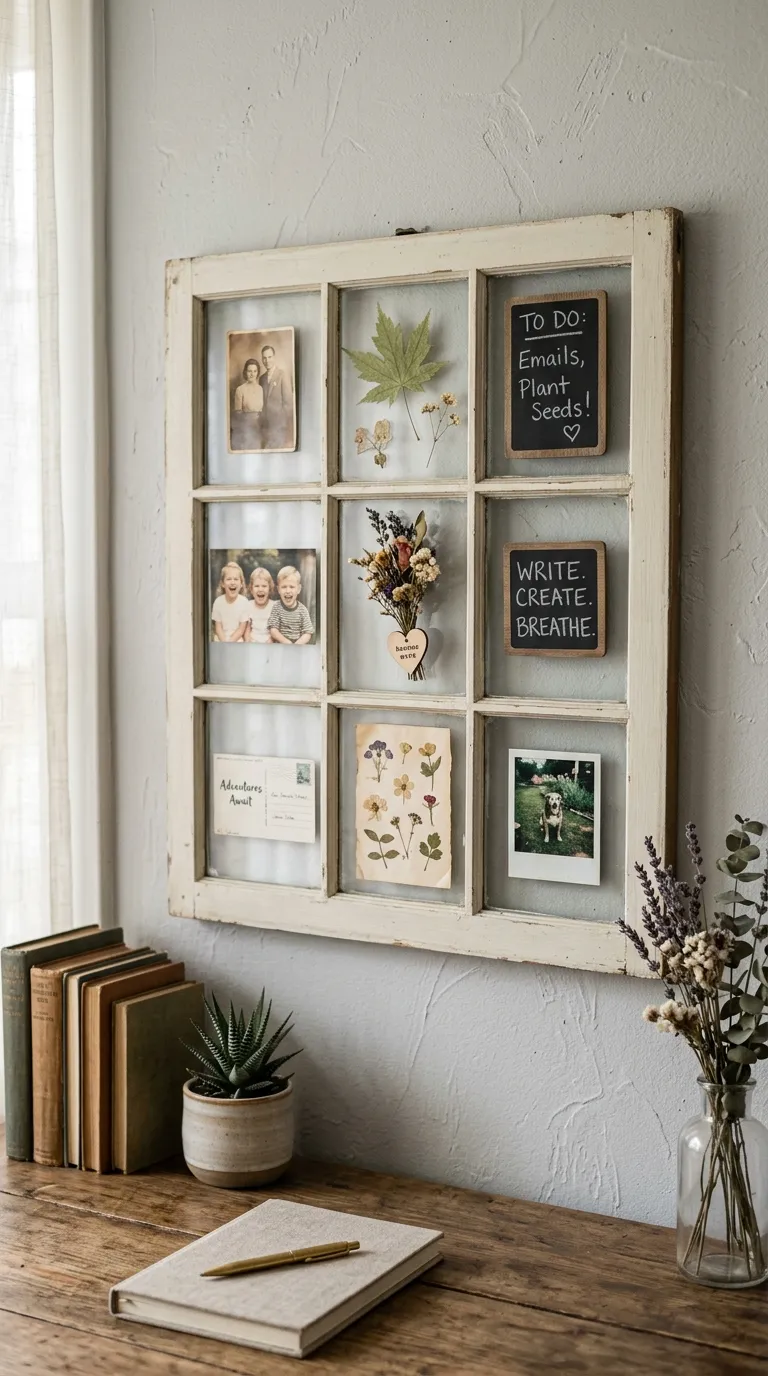
There is a quiet magic to old window frames, and turning one into a wall organizer is a project that always turns out more charming than expected. A vintage windowpane wall organizer uses the existing grid of the frame as natural dividers, creating little sections for photos, notes, small plants, and meaningful keepsakes.
You will need an old window frame (look for these at salvage yards, estate sales, or online marketplaces), a piece of thin plywood or hardboard for the back, small L-brackets for mounting, and a finish. Remove any old paint or flaking finish, sand the frame, and apply a fresh coat in the color of your choice. Add the backing board, then mount the entire frame on the wall.
This build is genuinely beginner-friendly and usually takes two to three hours, with most of that being sanding and finishing rather than construction. The windowpane grid is the design feature, so resist the urge to over-decorate. A few carefully chosen items in each pane will look far more elegant than trying to fill every space.
For a more functional twist, add a small chalkboard panel to one or two panes, hang a tiny clip from a screw, or tuck a small cork square behind one section for pinning notes. The frame can be painted in soft white for a cottage look, deep green for a moody feel, or left natural for a Scandinavian touch.
A common mistake with this project is skipping the backing board. Without it, items simply fall through the open panes. A thin piece of plywood painted the same color as the wall keeps the focus on the frame and the objects inside it.
Frequently Asked Questions
What type of wood is best for DIY wall organizers?
Pine and poplar are the most beginner-friendly options because they are affordable, easy to cut, and take paint or stain well. Plywood is excellent for projects with backing boards or larger panels. For a more rustic look, reclaimed pallet wood and old barn wood bring natural character, though they require extra sanding and inspection for old hardware.
How do I hang a heavy wooden organizer safely?
Always anchor into wall studs whenever possible, especially for heavier pieces like ladder shelves or cube grids. Use a stud finder to locate the studs, then drive long wood screws directly through the organizer and into the stud. For drywall without studs, heavy-duty wall anchors rated for the weight of the loaded organizer are essential. When in doubt, over-engineer the mounting rather than risk a piece coming down.
Can I build these projects without power tools?
Several of these ideas can be tackled with just a hand saw, a drill, sandpaper, and a bit of patience. Projects like the hanging clipboard command center, the drawer-pull organizer, and the windowpane organizer are all very forgiving for hand-tool builders. Projects that involve precise angled cuts or large plywood panels, like the modular cube grid, are much easier with a circular saw or miter saw.
How do I finish wood so it looks polished but still natural?
A light sanding with fine-grit sandpaper followed by a clear matte polyurethane is one of the simplest and most foolproof finishes. It protects the wood without adding shine, which keeps the natural grain visible. For a more weathered look, a single coat of watered-down paint wiped back with a rag creates a soft, whitewashed effect that works beautifully in farmhouse-style offices.
Are these projects renter-friendly?
Some are more renter-friendly than others. The leaning ladder shelf, the vertical file holder that stands on its own, and the rustic crate system all avoid the wall entirely. For organizers that require mounting, command strips rated for the weight, removable adhesive hooks, or a single small nail hole are often allowed. Always check with your landlord before drilling into walls.
What is a good budget for these DIY wooden wall organizer ideas?
Most of these projects can be completed for between twenty and seventy-five dollars in materials, especially if you use pine, plywood, or reclaimed wood. The hanging clipboard command center and the minimalist floating shelf organizer are typically the most affordable, while the modular cube grid and the reclaimed wood ladder shelf tend to sit on the higher end of the range.
How do I keep my wall organizer from looking cluttered over time?
Set a simple rule for yourself about what earns a spot on the wall. Choose a small color palette and stick with it, so the organizer becomes part of the decor rather than a magnet for stray papers. A quick weekly tidy, even just five minutes, keeps things from piling up and ensures your handcrafted organizer continues to feel like a joy rather than a chore.
There is a particular kind of satisfaction that comes from looking at a wall organizer and knowing you built it with your own hands. Each of these ten DIY wooden wall organizer ideas for offices offers a different mood, a different skill level, and a different way to bring order and beauty into your workspace. Pick the one that speaks to you, gather your materials on a quiet weekend, and give yourself permission to make it your own. The office of your dreams is closer than you think, and it might just start with a single piece of wood and a good idea.