A wooden coat rack in the entryway is one of those quiet heroes of a home. It catches bags, hats, leashes, and damp jackets before they land on the nearest chair. It also gives a small space personality, warmth, and a little bit of order. If your entryway feels like a drop zone rather than a welcome, building your own rack can solve the clutter while adding a custom piece that fits your wall, your style, and your family’s daily rhythm.
The ideas below range from beginner-friendly peg racks to weekend-worthy bench builds. Some use reclaimed wood and basic hooks, while others bring in shelves, baskets, or hidden storage. You do not need a fully equipped workshop to make most of them. A drill, a saw, sandpaper, and a bit of patience will get you far. Along the way, you can choose the wood tone, hook finish, and mounting height that suit your entryway.
Whether you are sprucing up a rental, finishing a mudroom, or creating a landing spot beside the front door, these 10 DIY wooden coat rack ideas for entryways give you practical plans and room to make each project your own.
Quick Answer: The best DIY wooden coat rack ideas for entryways combine sturdy wood, quality hooks, and smart placement. Popular options include a rustic reclaimed wood wall rack, a minimalist peg rack, a farmhouse shelf rack, a pallet wood design with baskets, and a corner bench rack. Most can be built in a few hours, and the right height is usually 66 to 72 inches for adults, lower for children.
1. Rustic Reclaimed Wood Wall Coat Rack
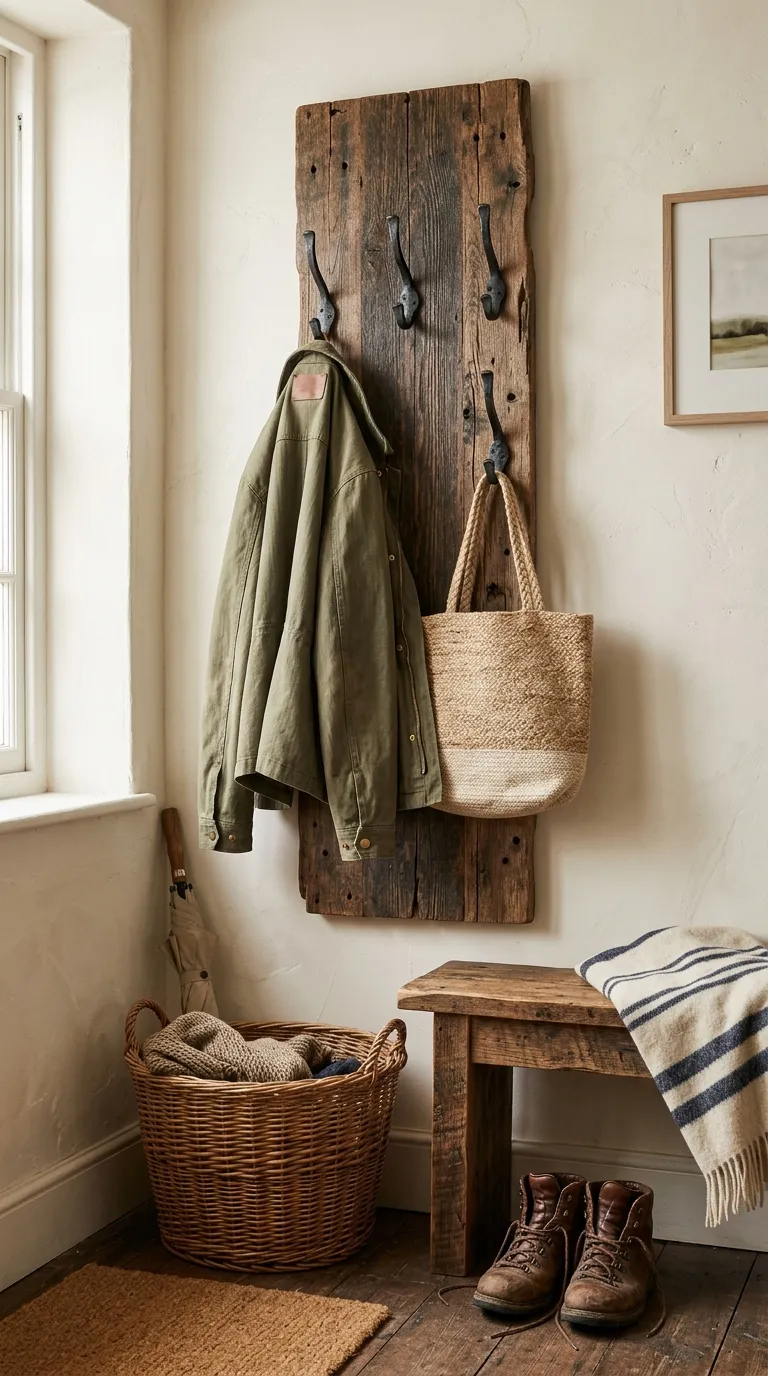
Reclaimed wood brings instant character to an entryway. A simple board with a few black metal hooks can look like it came from an old farmhouse, even if the wood started as a pallet or a leftover floorboard. This project is forgiving because dents, nail holes, and uneven edges add to the charm rather than ruining the finish.
Materials: a reclaimed wood board about 30 to 36 inches long, 4 to 5 heavy-duty coat hooks, 1½-inch wood screws, wall anchors, a drill, sandpaper, a stud finder, and a clear matte polyurethane or wax finish.
Instructions: Cut the board to your desired length. Sand rough spots, but leave some texture. Wipe away dust and apply a thin coat of finish if you want protection. Mark hook placement with a pencil, keeping 4 to 6 inches between hooks. Pre-drill pilot holes so the wood does not split. Screw the hooks into the board. Then mount the board into wall studs whenever possible. If studs are not available, use heavy-duty anchors rated for the weight of coats and bags.
Time: 1 to 2 hours. Difficulty: Beginner. Customization: Choose matte black, oil-rubbed bronze, or nickel hooks. You can also add a small shelf above the board for hats or a candle. Display idea: Hang it near the door with a woven basket on the floor for shoes. Budget alternative: Use pallet wood or a scrap board from a lumber yard. Common mistake: Mounting only into drywall. Coats get heavy, especially in winter, so secure the rack into studs or use proper anchors.
💡 Pro Tip: If your wall has baseboard trim, measure from the floor to the bottom of the trim before deciding where the rack will sit. You want the lowest hook to clear the trim and still be reachable.