10. The Upcycled Washing Machine Drum Tumbler
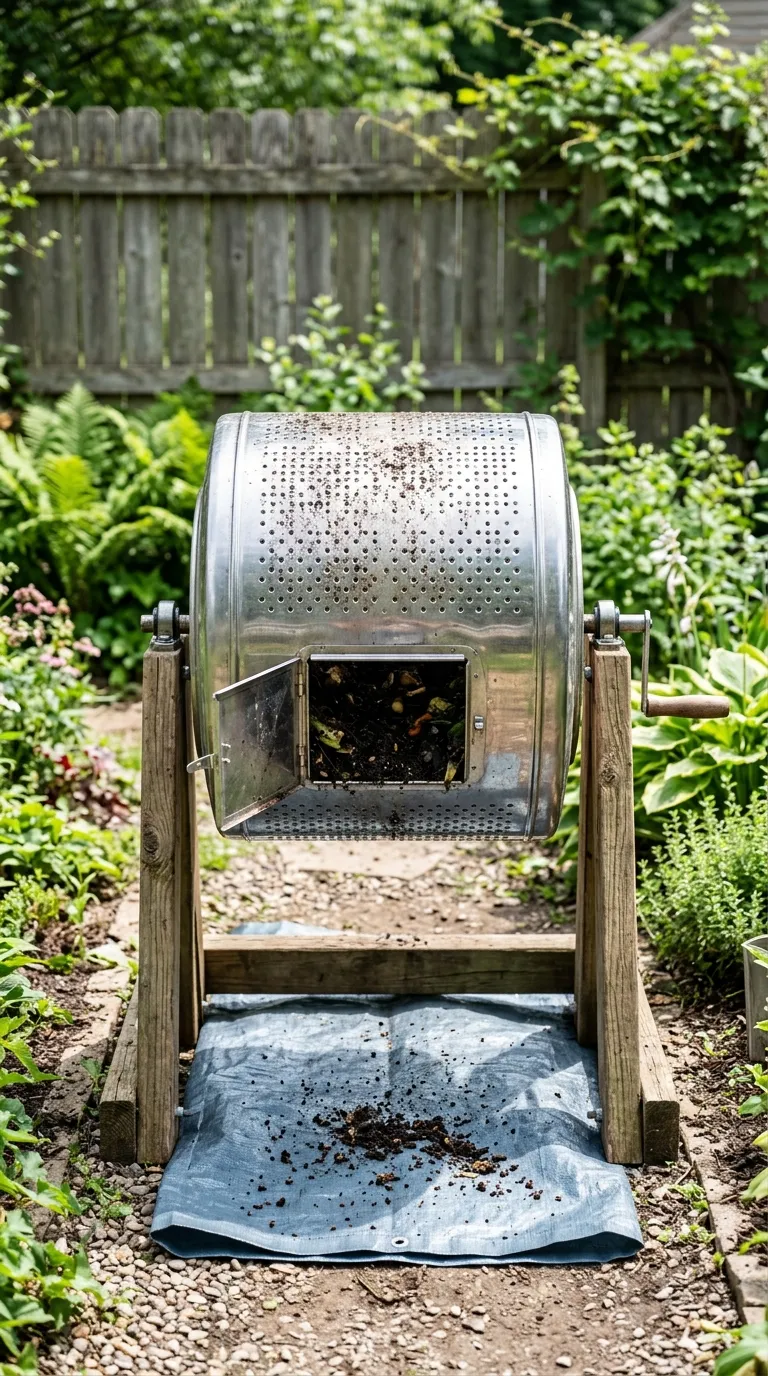
Old washing machine drums are one of the best-kept secrets in DIY gardening. They are stainless steel, already perforated with drainage and airflow holes, and many of them come with a hinged door built right in. If you can find one at a repair shop, scrap yard, or through a local buy-nothing group, you have the core of a tumbler for free.
What you need:
- A stainless washing machine drum with its door panel if possible
- A steel rod axle and two bolts
- A wooden or metal frame
- A drill with a metal-cutting bit, plus a latch
Time: 2 to 3 hours. Difficulty: intermediate beginner.
Wash the drum thoroughly to remove any soap residue. If your drum does not have a door, cut an opening in the side and reattach the removed piece with hinges and a latch. Mount the drum on an axle through the center of the back plate and set it into a sturdy frame — steel drums are heavier than plastic, so your stand needs to be genuinely solid, not wobbly.
The existing perforations give you excellent airflow, which means faster decomposition and less risk of a sour, anaerobic batch. The trade-off is that fine compost can sift out through the holes, so set a tarp underneath or place the frame over a paved area you can sweep clean. Stainless steel also handles cold weather far better than brittle plastic, making this a good option for gardeners in colder zones.
How long does it take to get finished compost from a tumbler?
Most tumblers produce usable compost in four to eight weeks during warm weather, compared with several months for a passive pile. The speed depends on how small you chop your material, whether you keep the moisture right, and how often you turn it. In cold weather, expect everything to slow down considerably.
What can I put in a compost tumbler?
Fruit and vegetable scraps, coffee grounds, tea leaves, eggshells, grass clippings, shredded paper, cardboard, dry leaves, and small amounts of sawdust all work well. Skip meat, fish, dairy, oily foods, pet waste, and anything treated with pesticides. Because a tumbler is enclosed, it handles kitchen scraps better than an open pile, but it still cannot process everything.
Do I need to add water to a tumbler?
Only if the contents feel dry. Squeeze a handful — it should feel like a wrung-out sponge, damp but not dripping. Tumblers dry out faster than ground piles, especially in summer and especially if they get direct sun, so check every week or so and add a little water if needed.
Why does my compost tumbler smell bad?
A sour or rotten smell almost always means the batch has gone anaerobic. The usual culprits are too much green material, too much moisture, or not enough turning. Add a generous handful of dry browns like shredded paper or leaves, give it a good spin, and leave the door open for an hour or two to let air in.
How often should I turn a compost tumbler?
Every two to three days is plenty. Turning more often will not hurt anything, but it will not speed things up dramatically either. The important thing is consistency — a batch that gets spun regularly breaks down far faster than one that sits untouched for weeks.
Can I use a compost tumbler in winter?
Yes, but decomposition slows to a crawl once temperatures drop near freezing. Keep adding material and turn it occasionally, then expect the real action to resume in spring. Plastic drums can become brittle in hard frost, so be gentle when spinning them in cold weather.
Do I need to drill holes for airflow?
Yes, airflow is the whole point. Without aeration holes, the material goes anaerobic, smells, and breaks down slowly. Drill a scattered pattern of quarter-inch holes around the upper portion of your container, and keep the bottom mostly solid so moisture and nutrients stay inside.
Every one of these builds does the same fundamental job: it keeps scraps contained, lets you introduce air with a quick spin, and gives you compost without a pitchfork or a backyard that smells like a science experiment gone wrong. Start with whichever version matches the materials you can actually get your hands on this week. A two-can roll method in the corner of a patio today beats a beautiful barrel project you keep putting off until next spring.
Once you have one running, make it yours. Paint the barrel to match your shed, add a small hook for your gloves, or mount a cheap thermometer through the side so you can watch the temperature climb. The first time you dig into a batch and find dark, crumbly compost where your coffee grounds used to be, you will understand why so many gardeners get quietly obsessed with this stuff.