There is a particular kind of satisfaction that comes from scraping carrot peels and coffee grounds into a bin, giving it a spin, and walking away knowing that in a few weeks you will have dark, earthy compost for your beds. For a lot of new gardeners, though, the traditional compost pile is where good intentions go to die. It gets soggy, it gets smelly, it attracts flies, and turning it with a pitchfork is the kind of chore that ends up on the bottom of the list.
A tumbler solves most of that. Because the contents get aerated every time you rotate the bin, the pile breaks down faster, smells far less, and stays out of reach of curious raccoons. The catch is that store-bought tumblers can cost a couple hundred dollars, and many of them are smaller than the marketing photos suggest. That is exactly why these DIY garden compost tumbler ideas for beginners exist — they use barrels, bins, buckets, and cast-off materials you may already have, and none of them require a workshop full of power tools to pull off.
Below you will find ten different builds, ranging from a two-minute no-tool setup to a weekend project with a wooden cradle. Each one lists what you need, how long it takes, and where beginners usually trip up. Pick the one that matches your space, your budget, and how handy you feel like being this month. Your soil will not judge you either way.
Quick Answer: The most beginner-friendly DIY garden compost tumbler is a food-grade 55-gallon plastic drum with a cut door, a latch, and a metal rod axle mounted on a simple wooden or PVC cradle. If you want something even faster, drill aeration holes into two lidded trash cans and roll them along the ground. Both keep scraps contained, aerate the pile as you turn it, and cost a fraction of a commercial tumbler. Aim for roughly two to three parts brown material to one part greens, keep it as damp as a wrung-out sponge, and spin it every few days.
1. The Classic 55-Gallon Drum Tumbler on a Wooden Cradle
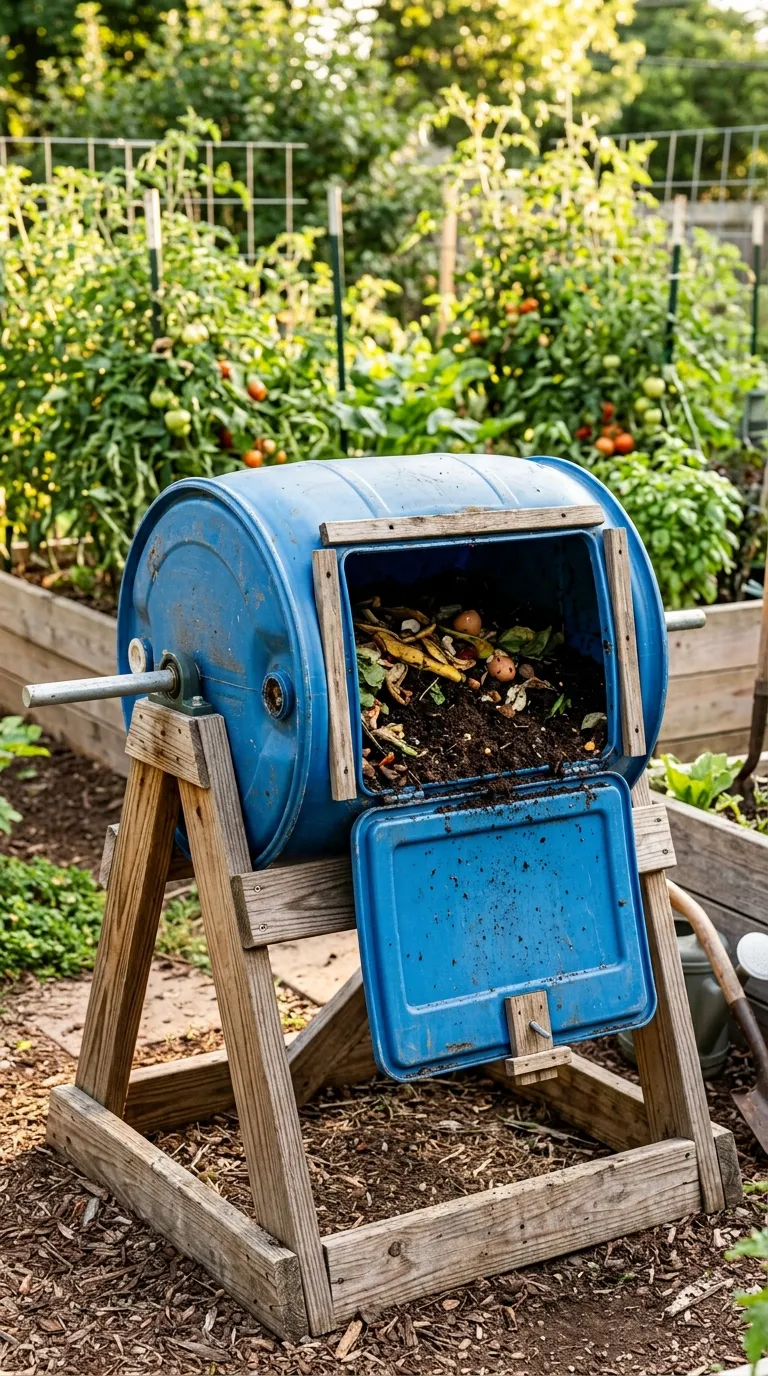
This is the build most people picture when they imagine a homemade compost tumbler, and for good reason. A 55-gallon drum holds enough material to actually heat up, and plastic drums are lightweight enough to spin by hand once they are empty.
What you need:
- A food-grade plastic 55-gallon drum (check that it previously held something edible — no motor oil or pesticides)
- A 3/4-inch galvanized steel rod or pipe, about 4 feet long
- Two 4×4 posts or heavy 2×6 boards for the cradle
- A drill with a 1-inch hole saw and a 1/4-inch bit
- A jigsaw or angle grinder for cutting the door
- Two hinges, a latch or bungee cord, and stainless screws
Time: about 3 hours. Difficulty: beginner with basic tools.
Cut a rectangular door roughly 12 by 15 inches into the side of the drum, keeping the piece you remove so it can become the door itself. Drill a ring of aeration holes around the drum body — a dozen or so is plenty. Next, find the center of both flat ends and drill a hole for your axle. Push the rod through and secure it with a bolt or a hose clamp on each side so the drum cannot slide off. Build a simple A-frame or U-shaped cradle from your lumber, drill matching holes near the top of each upright, and drop the axle ends into them.
Fill it about two-thirds full, close the door, and give it five or six full rotations every couple of days. Empty drums can be top-heavy once loaded, so set the cradle wide enough at the base that it will not tip when you spin it hard.
💡 Pro Tip: Mark the true center of your drum by drawing two lines across the lid from edge to edge. Where they cross is your axle point — eyeballing it usually leads to a wobbling tumbler.